

Setup Nebari domain registry
What is a DNS?
Section titled “What is a DNS?”The Domain Name System (DNS) turns domain names into IP addresses, which browsers use to load internet pages. Every device connected to the internet has its IP address, which other devices use to locate the device. DNS name servers are used to locate the IP address of a domain name using words or instead of direct IP addresses.
Setting up a DNS
Section titled “Setting up a DNS”During deployment, Nebari will generate an Ingress IP for connection with the Kubernetes cluster and all related services that Nebari runs. If not automatically handled, Nebari will request the user to generate the necessary DNS records and update the domain within the newly created IP:
Take IP Address 12.312.312.312 and update DNS to point to "your.domain" [Press Enter when Complete]Once the IP is generated, you will need to grab it and create the necessary records within the DNS provider of your choice. Setting a DNS record heavily depends on your provider, so an internet search for A/CNAME record for your specific provider should yield helpful results.
Cloudflare
Section titled “Cloudflare”Nebari supports Cloudflare as a DNS provider out of the box. If you choose to use Cloudflare, first create an account, then there are two possible following options:
-
You can register your application domain name on it, using the Cloudflare nameserver (recommended).
-
You can purchase a new domain with Cloudflare.
To generate a token follow the steps below. For additional information, see the CloudFlare docs.
Setting up an API token on CloudFlare
Section titled “Setting up an API token on CloudFlare”-
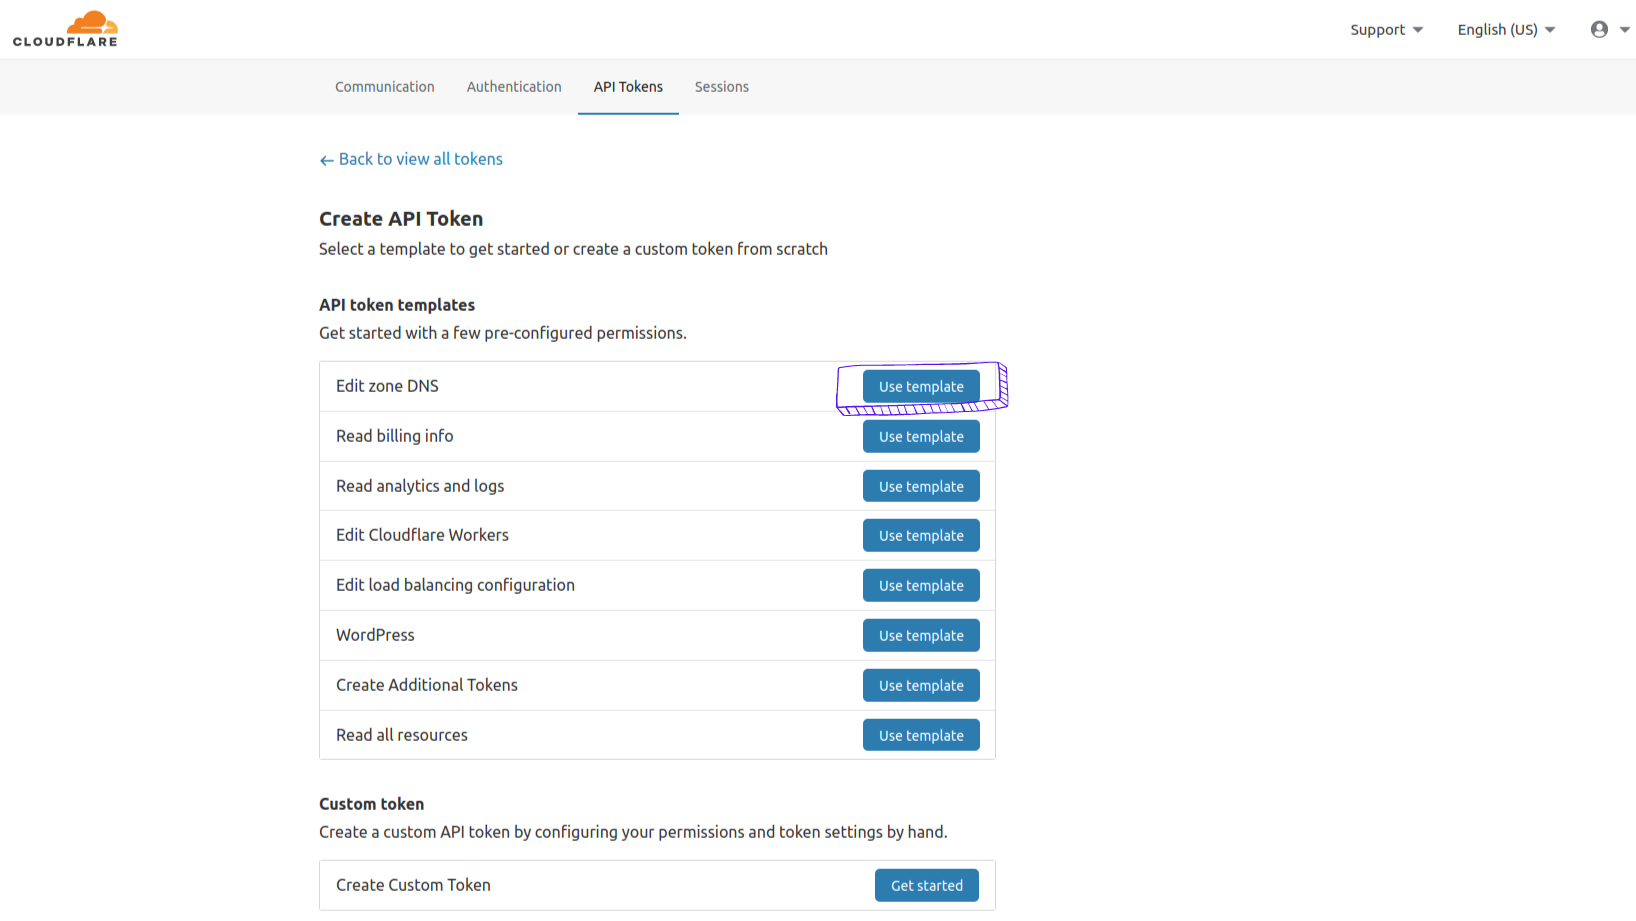
Under Profile, select the API Tokens menu and click on Create API Token.
-
On Edit zone DNS click on Use Template.
 .
. -
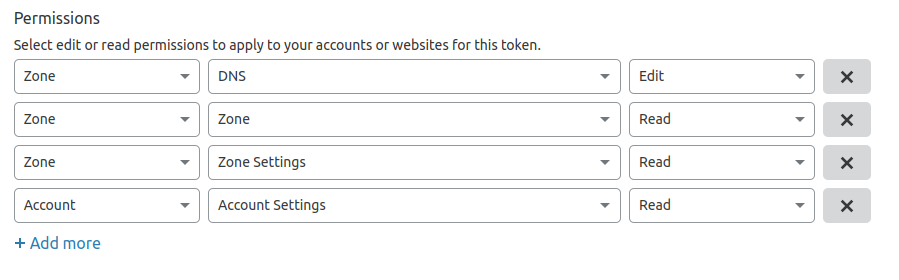
Configure Permissions such as the image below:
-
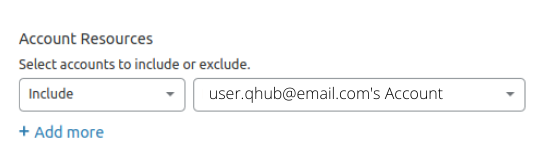
On Account Resources set the configuration to include your desired account.
-
On Zone Resources set it to Include | Specific zone and your domain name.

-
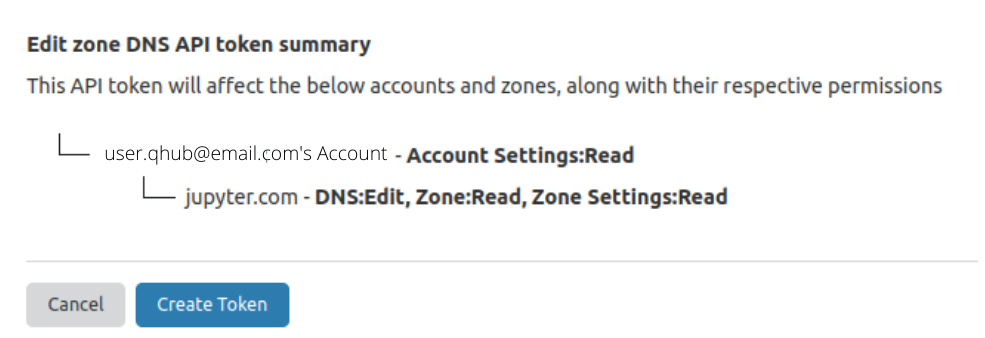
Click continue to summary.
-
Click on the Create Token button and set the token generated as an environment variable on your machine.
Setup API token locally
Section titled “Setup API token locally”Finally, set the token value as an environment variable:
export CLOUDFLARE_TOKEN="cloudflaretokenvalue"Also, add a dns section to the nebari-config.yaml file.
dns: provider: cloudflareUsing other DNS providers
Section titled “Using other DNS providers”Currently, Nebari only supports CloudFlare for [automatic DNS registration](link to automatic section below). If an alternate DNS provider is desired, change the dns.provider field from cloudflare to none in the nebari-config.yaml file.
Below are the links to detailed documentation on how to create and manage DNS records on a few providers:
- Cloud DNS provider
- Amazon Route 53 DNS provider
- Azure DNS provider
Automatic DNS provision
Section titled “Automatic DNS provision”Nebari also supports management and the creation of the DNS records for you automatically. For automatic DNS provision add dns.auto_provision to your Nebari config file:
dns: provider: cloudflare auto_provision: trueThis will set the DNS provider as Cloudflare and automatically handle the creation or updates to the Nebari domain DNS records on Cloudflare.
When you are done setting up the domain name, you can refer back to the Nebari deployment documentation and continue the remaining steps.